Showing posts with label snack. Show all posts

Sunday, June 30, 2013

Coconut & Chocolate Chip Oatmeal Cookies


I can't wait, one more week and me and the hubby will be off to the east coast for a much needed vacation.  I think its been about 2 years since we've been on a vacation.  Our last one was in 2011 after we came back from a 8 month deployment in Iraq.


In the military we earn 30 days of leave a year and when you dont use that leave up they just roll over to the next year. Basically we earn about 2.5 days of leave every month.  

Some people dont normally have issues with taking leave from their work centers. But then if you are one of those unlucky people who have jobs where its very hard to coordinate leave, you can end up not taking leave for several years and have about 70-80 in the books to use. But it doesn't help to save that much leave because you are only authorized to use 30 days at anyone given time, you can never go over 30 days without commander approval.  When I was a mechanic it was extremely hard to take leave beause of low manning and workload so I only took a vacation about every other year.  My new job as a paralegal is pretty much the same, only because we dont have many people in the office and we can get pretty busy with court-martials.  Im fortunate enough that I was able to coordinate some leave for about 3 weeks and now we are off to a family reunion in New York plus a Dave Matthews concert in Hersey PA! Plus I'm pretty excited to go back to the states and shop.


These cookies were a big hit at work the combination of chocolate and coconut combined within a oatmeal cookie seemed like the perfect match. Plus it helps when you just overload the batter with chocolate chips so every cookie and every bite took you got come chocolate chips and coconut. 


Coconut & Chocolate Chip Oatmeal Cookies
Adapted from the Messy Baker

Yields: 25-30 cookies depending on size

Ingredients

1/2 cup unsalted butter at room temp
1 cup packed brown sugar
1 egg
2 teaspoons vanilla extract
1 cup flour
1/2 teaspoon baking soda
1/4 teaspoon salt
1 1/2 cups old fashinoned rolled oats
3/4 cup chocolate chips (your favorited kind)
3/4 cup sweetened coconut flakes

Directions

1. Preheat oven to 350 degrees, and line a cookie sheet with parchment paper.

2. In a medium sized bowl, whisk togehter the flour, baking soda, salt and oats, set aside.

3. In a electric mixer on medium speed, beat together the butter and sugar until light and fluffy about 3 minutes, add in the eggs and vanilla extract until completely combined.

4. Switch the mixer to low speed and gradually add in the flour mixture until combined, making sure the scrape down the sides of the bowl to incorportate everything together.

5. Fold in the chocolate chips and coconut into the batter and depending on how big you want to make your cookies roll a 1 to 2 inch ball together slightly flatting it and place it on the parchment paper 2 inch apart from each other  Bake for 12-15 minutes or until lightly golden brown. Remove cookies from oven and cool on a wire rack. Enjoy with a giant glass of milk!

*This cookie dough can be made ahead and kept in the fridge up to 5 days in an air tight container.


Sunday, May 19, 2013

Old Fashioned Oatmeal Raisin Cookies


Military Life:  Okay, so I'm swimming in oatmeal right now, I have about 3 giant containers of oatmeal currently in my pantry and there is no possible way me and my husband can finish it all before their expiration date.  Now I didn't go to the store and purposely buy an over abundance of oatmeal on my own, I acquired most of it from friends PCSing (Permanent change of Station).  We like our acronyms in the military.

In the military we normally move about every 3 to 4 years. You'll stay at one base for a period of time until you receive orders for another base somewhere around the world.  So usually your neighbors and friends around you are constantly moving in or moving out and that means people have to get rid of persihbles they cannot pack with them, because honestly you wont see your house hold goods for about 2 months while moving to another base. 

One of my neighbors just packed her goods for Germany (I'm jealous!) and had a ton of left over baking goods and donated them to me.  So now its up to me to put all this oatmeal to good use and why not make something that is nostalgic to childhood and bake some delicious chewy oatmeal raisin cookies. I love my cookies with tons of oatmeal and raisins in every bite, some people are raisin haters, but not I, please give me a cookie loaded with sweet raisins. 


 I made these cookies with a limited amount of sugar (no white sugar either) tons of raisins and added some cinnamon and ginger. These cookies baked up nice and plump with the raisins giving the cookie some added sweetness, these go perfect with a giant glass of milk. More oatmeal goodies to come, can't wait to share another oatmeal cookie version with you soon, a little hint theres going to be coconut : )


Old Fashioned Oatmeal Raisin Cookies

Recipe from Oishii Treats

Yields: 30-34 cookies

Ingredients

2 cups old fashioned oatmeal
1 1/4 cups flour
3/4 teaspoon baking soda
1/2 teaspoon salt
1 teaspoon ground cinnamon
1/4 teaspoon ground ginger
3/4 cup butter (12 tablespoons), at room temp
1 cup packed dark brown sugar
2 eggs
2 teaspoon vanilla extract
1 cup rasins


Directions

- Preheat the oven to 350 degrees and line a cookie sheet with parchment paper
- In a large mixing bowl whisk together the oatmeal, flour, baking soda, salt, cinnamon and ginger and set aside.
- In a electric mixer beat your butter and brown sugar together until fluffy, scraping the side of the bowl when needed, about 3 minutes. Add in your eggs one at a time until fully incorporated and then your vanilla extract.
- On low speed slowly add in your dry ingredients, scrapping down the side of the bowl to get all the flour combined, once done switch to medium/high speed and mix the dough until all ingredients are combined.  Add in the raisins and mix for 30 seconds.
- Using a spoon roll about a 1inch ball of dough and slightly flatten with the palm of your hand, place the on the cookie sheet about 2 inches apart from one another, I could fit about 9 on my cookie sheet.


- Bake for 13-14 minutes, remove from oven and let sit on the cookie sheet for 4 minutes and then transfer to a wire rack to cool completely. Store in an air tight container for up to 3 days.


Sunday, April 28, 2013

Easy Homemade Soft Pretzels


Who would have thought you can make quick soft pretzels at home, no venturing to a crowded and loud mall required. You're probably thinking right now, yeah right making pretzels at home is sooo time consuming, what with making the dough, kneading the dough, the rising of the dough, the boiling of the dough, etc.  That's what I thought too! But due to some good fortune I stumbled across a blog that promised pretzel making would be simple and done in 30 minutes...."pshh, I gotta try this for myself", I thought. nom nom nom...excuse me, sorry im in the middle of finishing my 3rd preztel, and trying to type at the same time. 


Oh man, Sally's baking addiction wasn't kidding! These were some awesome and quick pretzels.  They were not only super fast to make, but there is no dough rising, no boiling, and barely any kneading involved. They were uber soft and I could barely contain myself when these bad boys came out of the oven. I wanted to stuff my face before I could even take photos, but then I snapped to it soon enough to realize if I ate all the pretzels immediately, then there would be none left to take pictures of... phew, close call. Once I took the pictures I then proceeded to stuff my face :)


 I hope you try these preztels for yourself, I was always a little intimidated with pretzel making but this recipe replaced all my fears and I cannot wait to try all sorts of different variations of pretzel flavors, like cinnamon and sugar, jalapeno, chocolate....the list goes on and on. 


30 Minute Homemade Soft Pretzels
Adapted from Sally's baking Addiction

Yields: 8-10 Pretzels

Ingredients

1 1/2 cups luke warm water
1 packet of highly active yeast (I used Fleischmann's)
1 teaspoon salt
1 tablespoon sugar
4 cups all purpose flour
1 large egg
course sea salt

Directions

-  Preheat the oven to 425 degrees and line a cookie sheet with parchment paper.
-  In a large bowl, pour in the warm water and yeast, stir with a spoon until the yeast is dissolved, about 1 minute. Add in the salt and sugar and stir until incorporated.
-  Slowly add in the flour about 1 cup at a time, mix with a wooden spoon until it gets sticky, continue to add in all your flour and at this point is when I started to use my hands to finish mixing the dough. The dough should no longer be sticky.
-  Knead the dough for about 5 minutes on a lightly floured surface, once kneaded, shape into a ball, with a knife or your hands separate the dough into about 1/3 cup sections, or use smaller or bigger sections depending on how large you want your pretzels.

Divide your dough into sections
-  Roll the dough into a long rope about 20 inches long and form the pretzel shape and place on your parchment paper.

-  In a shallow bowl beat your egg and dip the pretzel (both sides) into the egg wash and place back onto your parchment paper and sprinkle with sea salt.

Dipped in egg wash
-  Bake for 10 minutes at 425 degrees, and turn the oven to broil for the last 3-4 minutes until the tops of the pretzel are golden brown, be careful to keep an eye on the pretzels once you switch it to broil because it might take only a couple of minutes for your pretzels to brown depending on your oven.

This was left in 4 minutes once switched to broil

This was left in for 3 minutes once switched to broil


I link up to these awesome parties! including the newest addition Our Growing Edge over at Bunny Eats Design.  

Sunday, April 21, 2013

Gotta Love Coconut Oil: Strawberry Banana Muffins w/ Streusel Topping


I've been on a mission lately to dust off some of my kitchen gadgets and pans I've bought months ago and finally let them complete their mission in life. 

I've have this jumbo muffin pan, which has been sitting in the back of the cabinet underneath the multiple loaf pans, regularly used cupcake tins, and donut pans.  Just sitting there sad and lonely, and I started to feel sorry for it.  I know I know it sounds silly, why should I feel sorry for a inanimate object.  But I do, becuase why bother buying something if you aint going to use it, then your just wasting money and taking up space in your tiny kitchen that can barley hold all the kitchen crap you've already accumulated over the years....am I right?  


So today was the day the jumbo muffin tin was going to have its day in the oven. I adapted my nanas banana bread recipe and came up with one hell of an oishii muffin.  I love using coconut oil in place of butter or vegetable oil, not only is it better and healthier for you but it gives the baked goods an extra special flavor that you wouldn't get with butter or vegetable oil.  These Jumbo muffins are great for breakfast along with a cup of coffee or as a snack. They are loaded with fruit and incredible moist, thanks to the rippend bananas, greek yogurt and coconut oil. You got to give these a try, if you're not a strawberry fan then you can easily switch out the strawberries for blueberries, raspberries or just use bananas. 
Now go save a lonely unused kitchen gadget or pan today and you'll be happy you did.

Saturday, March 2, 2013

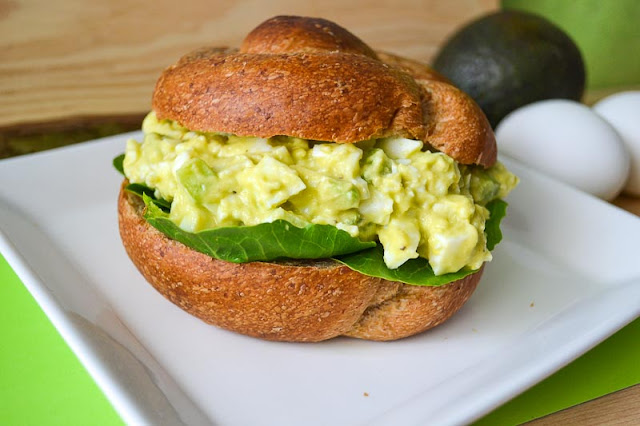
Avocado Egg Salad Sandwich


Ugghhh the weather outside is nasty today, the wind is whipping around, ice/snow is falling sideways, its just not pleasant to venture outside today.  I want spring and I want spring now! So I thought I would make a great spring sandwich and pretend that spring time is on its way and forget that we still    have 2 more months of winter here in Northern Japan :(
 You know what the best thing about spring is?.... Easter Candy! I love walking into the store and seeing aisles of easter candy stacked towards the celling.  My all time favorite, hands down, are the cadbury mini eggs, I could probably polish off a entire bag of them by myself.  It takes a lot of will power not to finish the bag in 1 day. 


  This spring time sandwich will not only have you thinking of spring, but it's a healthy alternative to your everyday egg salad.  There is only a small dollop of mayo and only half the egg yolk is used, the rest of your creaminess comes from the mashed avocado which is good for you because they are full of healthy fats. 


Avocado Egg Salad Sandwich
Recipe adapted from Skinny Taste
Yields: 2 servings

Ingredients

4 slices Whole Wheat Bread or 2 Whole Wheat egg twist rolls sliced in half
2 hard boiled eggs with yolks, diced
2 hard boiled egg, without yolks, diced
1 1/2 tablespoons miracle whip
1/2 avocado mashed
1/2 cup celery, diced (about 1 large stalk)
1 1/2 tablespoons apple cider vinegar
salt and pepper to taste

Directions

- In a Medium bowl mash together your avocado and egg yolks, add in the rest of your ingredients and mix until completely combined. Salt and pepper to taste.
- Toast your bread or roll and top with your acovado egg salad and enjoy.

It helps if you mash your avocado and yolk
in the bowl first before adding the rest
of the ingredients, I like to learn the hard way ;)


Sunday, February 24, 2013

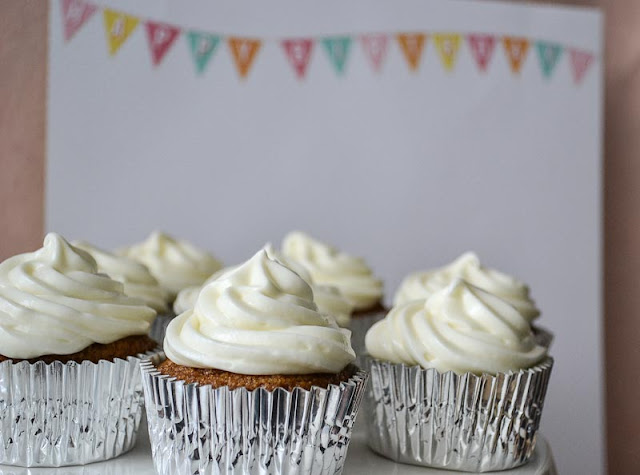
Carrot Cake Cupcakes


I love me some veggies in my cupcakes, who doesn't!  Its a great way to sneak in some vegetables and not feel so guilty eating a delicious cupcake or 2 ;)....okay who am I kidding, there's not that much veggies in a carrot cake cupcake, it would be better if you just ate a carrot.  But at least you dont feel as guilty eating carrot cake as you would say a chocolate cupcake :)  

I made these moist and delicious cupcakes for a birthday party last night, paired with a slightly tangy lemon cream cheese frosting it was the perfect addition that put these cupcakes over the top and made them a huge hit at the party.


Carrot Cake Cupcakes
Adapted from Paula Deen

Yields 24-28 cupcakes

Ingredients 

2 cups flour
1 3/4 cups sugar
2 teaspoons baking soda
2 teaspoons cinnamon
1 teaspoon salt
4 eggs
1 1/2 cups canola oil
3 cups grated carrots

Directions

- Preheat oven to 350 degrees, and line your cupcake pans with 24 liners
- In a electric mixer combined your flour, sugar, baking soda, cinnamon and salt and mix together on low for 30 seconds.
- Add in your oil and eggs and mix until completely combined
- Mix in your grated carrot and mix until fully combined into the batter.
- Using a ice cream scoop, fill your cupcake liners 3/4 full and bake for 17 minutes or until a toothpick comes out clean, remove from oven and cool on a wire rack.


Lemon Cream Cheese Frosting

Ingredients

6 tablespoons butter, at room temp 
12 tablespoons cream cheese, cold
1 tablespoon lemon juice
4 cups powdered sugar

Directions

- In a electric mixer beat the butter and cream cheese together until smooth and fluffy, about 5 minutes.
- Add in the lemon juice and slowly 1/4 cup at a time add in the powdered sugar until all of the powdered sugar is completely incorporated. 
- Beat the frosting for another 2-3 minutes and pipe onto your cupcakes.


Monday, February 18, 2013

Triple Chocolate Marshmallow Cookies


Chocolate lovers unite! this cookie will satisfy any chocolate lovers craving. These cookies are chewy, soft, chocolaty and delicious. The marshmallow in the middle gives it that extra gooey component. 

I will admit the frist couple of batches were trail and error, I thought that I would just add the marshmallows to the batter and let them bake....big mistake not only did it create a huge mess  but the marshmallows that oozed out of the cookie started to burn and turned hard and crunchy. So on the third batch i decided to take all the marshmallows out of the batter, by hand :/  and once the baked cookies came out of the oven I pushed a marshmallow into the middle and SUCCESS!  The marshmallow slowly melted into the middle of the cookie and I finally had my triple chocolate marshmallow cookie. 


Triple Chocolate Marshmallow Cookies
Oishii Treat Original
Yields: 30 cookies

1 cup butter at room temp
2/3 cups white sugar
2/3 cups packed brown sugar
2 eggs
2 teaspoons vanilla extract
3/4 cup cocoa
1 teaspoon baking soda
1/2 teaspoon salt
2 cups flour
1 3/4 cups dark chocolate chips (one 8 oz bag)
1 cup marshmallows (you can use regular small marshmallows if you dont have chocolate ones and add as many to the middle of the cookie as you like, I added about 2 marshmallows in the middle of each hot cookie)

Directions

- Preheat the oven to 350 degrees
- Cream together the butter and sugars until full incorporated  add in your eggs and vanilla extract and beat until combined.
- Add in the cocoa mixture, baking soda and salt once fully combined add in the flour and mix until fully incorporated
- Hand mix in your chocolate chips.
- Roll a 1 inch ball of cookie dough and place on a cookie sheet 1 inch apart from the other.
- Bake for 10 minutes, once you remove the cookies from the oven push a marshmallow into the middle of the cookie and place on a wire rack to cool.


Saturday, February 9, 2013

Chocolate Chip Banana Cake

I've had a nice short vacation this week, just what I needed to recharge for the next couple of months of courts, school and volunteer work. We spent the first 3 days in Sapporo Japan experiencing the extreme cold and the snow/ice festival. 
I gotta say you know the one thing that's a little unnerving about living in Japan? the amount of earthquakes and tsunami warnings we get.  Try being on a ferry off the coast of Japan for 8 hours with a tsunami warning flashing on the t.v constantly.  In Japan the minute there's an earthquake there will usually be a tsunami warning that follows, so they will put a small map of japan on the lower corner of every t.v. channel flashing either yellow or red with what areas are in potential danger for a tsunami.  Totally didn't calm me nerves while I was on the ferry for 8 hours, so i decided to turn off the tv and sleep until we reached our destination.   Thank goodness the boat ride was smooth and uneventful. The last few days this week have been spent at home unwinding and making some delicious recipes. I also wanted to share some pictures from Saporro Ice Festival, this is the biggest ice and snow festival in Japan.


Those are real fish and crabs in the ice
The snowboarding ramp was built right in the middle of the city in Odori Park

My Favorite snow sculpture and you can even see the guy on top still working on it


Back to the food, this is a nice healthy banana cake with coconut oil replacing the butter, some rolled oats added to the batter for fiber and of course gotta have some mini chocolate chips for a little indulgence. 


I had some extremely rippen bananas that needed to be put to good use, I also wanted an excuse to use a cake pan and test my new cloth baking strips to see if they actually work, they are supposed to go around the outside of your cake pan and they help the cake bake even with a flat surface instead of a dome shape.  I was pleasantly surprised that the cake came out pretty even, the strip prevented the sides from becoming to overly cooked and hard and for the most part the cake came out flat, with just a very slight dome.  If I didn't use the strips I know the cake would have came out with a larger dome. 


Chocolate Chip Banana Cake
Oishii Treat Original

Ingredients 

1 1/4 flour
1/2 teaspoon baking soda
1/8 teaspoon salt
1/2 teaspoon cinnamon
1/8 teaspoon ground ginger
1/8 teaspoon ground nutmeg
1/3 cup old fashioned rolled oats
1/3 cup coconut oil
1/2 cup packed brown sugar
2 ripe bananas mashed
1 egg
1/2 teaspoon vanilla extract
2 tablespoons skim milk
1/3 cup mini chocolate chips

Directions

- Preheat oven to 350 degrees, line a 8 inch cake pan with parchment or wax paper and spray with baking or cooking oil on the sides of the pan. (to prevent the cake to sticking to the sides)
- In a small bowl combined your dry ingredients flour, baking soda, spices and oats and whisk until mixed together.
- In a electric mixer cream together the coconut oil and brown sugar, add in your egg, vanilla extract and mashed bananas. Mix until combined.
- Add half the dry ingredients + 1 tablespoon milk to your wet mixture and mix till combined. Add in the rest of the dry ingredients with the other tablespoon of milk and mix until the batter is fully combined.
- Hand stir in your chocolate chips and pour the batter into the cake pan and level in out with a spatula.
- Bake for 35-40 minutes and remove from oven and let cool on a wire rack for 15 minutes, remove cake from pan and let cool to room temp. or serve warm with some whipped cream and a tall glass of milk.


I link up to these fun parties 

Related Posts Plugin for WordPress, Blogger...